Monday 30 December 2013

Crêpe Suzette!

HoHoHo

Happy dinners!

It is the time of the year when everybody fattens up! There is no denying it!
Dinner here, dinner there, seems like there are dinners everywhere.
 I went to four Christmas dinners... four I tell you! And believe me when I say that is a lot of food!
It started the 22nd with gourmet, you know the little pieces of meat you grill yourself and the slices of cheese you melt?! Delicious. The day after, I was the cook at my mothers house. Aperitif and cava, "Terrine" from marinated tuna and mozzarella *see instagram*, followed by lam rack (which had gone bad, and luckily we still had duck breasts in the freezer!) with seasonal vegetables and crêpe suzette for dessert! On Christmas eve it was at my girlfriends house: loads of aperitif, 3 versions of coquille, mussel soup, deer filet with all sorts of veggies and to end a smooth "moulleux au chocolat". And last but not least a feast with the family on Christmas day with food... loads of food.
After all this Christmasfood my stomach has had some time to settle down before another food-fest: New year's eve!
Oooh yeah... it is coming! Tomorrow evening we celebrate from 2013 to 2014!
If you still haven't decided what you are going to make for dinner, here are some ideas:
Well look at that... I haven't got any desserts on this blog! Time for my first dessert recipe!

Crêpe Suzette

This is a dessert everyone likes! Nice thin crêpes with a grand marnier and orange sauce. Delicious with some vanilla ice cream or just on its own! It is a classic in the French cuisine and supposedly invented by French actress Suzanne Reichenberg. 
I learnt this in cooking school... and I had to make it at the table in from of the customer. (well, except the crepes. We had to make those in advance) 

Some advice: There is flambéing involved. Make sure you feel good about doing this!


Ingredients:
For the Crêpes:
  • 200 gr white flour
  • 500 ml milk
  • 30 gr white sugar
  • 1 package of vanilla sugar 
  • 4 eggs
  • some butter
For the sauce:
  • 3 tbs white sugar
  • 3 tbs unsalted butter
  • about 25cl fresh orange juice
  • 10cl grand marnier (you may add more, but watch out with flambéing)
  • orange wedges from 2 oranges
  • orange zest
How to make is:
Start by cutting thin strips of orange zest. Zest is the upper part of the peel of an orange. Try not to get any white peel onto the zest because that will give off a bitter taste! The zests will still have a slightly bitter taste. If you want to get rid of this you have to parboil the zest a least 2 times a few minutes in fresh water.
Now continue by cutting the wedges from the oranges, and set them aside. Try to keep the spilled juice and press some more oranges until you have the required quantity of juice.
Crêpe baking time!
Take a large bowl and sieve the flour into it. Add the sugar and the vanilla sugar. Make a little hole in the middle and slowly mix in the eggs and the milk until you have a smooth, running dough. Melt some butter (do not make it hot! just melt it) and add it to the mixture. Bake the crêpes in a hot, greased pan. A thin crepe is a good one! Fold them in triangles (Fold in 2 and again in 2) and set aside.
Now the fireworks!
Take a large pan and melt the butter on high heat. When the butter has melted add the sugar and let it caramelize. When the sugar has a slightly brown color pour in the orange juice while stirring. Now add the crêpes and the orange zests.
Add the grand marnier and flambé the whole thing! 

How to flambé?
The correct way to do this is by pulling your pan slowly towards you with a slightly upward motion so the alcohol comes near the edge of your pan and the damps can catch fire from your stove. As soon as the pan is on fire, put it back and let the fire go out by itself.
If your stove is electric or induction use a lighter with a long neck or a long match to flambé, otherwise you could burn yourself! 
And do not, i repeat, DO NOT keep you head over you pan to get a bird's-eye view on the show, because you'll end up without eyebrows!
If you want to try flambéing other things in the future, e.g. banana or pineapple flambéed with rum, keep in mind it has to be with strong alcohol, which contains at least 40% alcohol.

Serve the crêpe suzette hot with the orange wedges and some vanilla ice cream!
Enjoy!


December 30, 2013


Saturday 30 November 2013

Grated chicory with ham and cheese

That face!

you make when you eat something bitter!

Chicory is generally a bitter vegetable. By removing the inner part and cooking it, the bitter taste softens.
Belgium was the biggest exporter of chicory, but today France is. The technique for growing these white endives was discovered in Belgium. This is why chicory also is known as Belgian endive, or as we call them in Belgium: "Brussels Lof".
Chicory can be eaten cooked or raw. It is perfect to use in a salad or as a salad! But also cooked, it is a nice vegetable, caramelized or braised for example. 
A recipe I like with chicory is grated with ham and cheese. This is how I learned to eat chicory as a child. Thank you ham and cheese!

Grated chicory with ham and cheese

Ingredients:
  • 3 heads of white chicory 
  • 6 slices of cooked ham (make sure they're big enough to wrap around ½ chicory)
  • 250-300 gr of grated cheese
  • 7 dl milk
  • 30 gr butter
  • 40 gr flour
  • nutmeg
  • salt and pepper
Preparation:
Cut the chicory heads in two and remove the hard end (make sure to remove the hard end by cutting in a V-shape, this will keep the leaves together). Take a large casserole and braise the chicory for about 10 minutes. In the meantime you can prepare the béchamel sauce.
Start by melting your butter, when it has melted add the flour and mix until you get a nice paste. This is called roux. Now gently pour on the milk, little by little, until you get a liquid sauce.
Mix in almost all of the cheese, you'll need some cheese to spread on top afterwards.
Roll the chicory in the cooked ham, place in an oven tray and pour over the béchamel cheese sauce. Finish with the rest of the grated cheese and put under a grill for about 10 minutes, until you have a nice golden-brown crust.
Serve with some bread or potatoes!
Enjoy!


November 30, 2013

Thursday 21 November 2013

Hamburger Trio!

Nananananananana...

BURGEEEEER!
(Sing it on the batman tune!)

Today I was walking clueless in the supermarket, thinking what I was going to have for diner. When suddenly I saw some ground chicken. A light bulb lit and I shouted:
IT IS BURGER TIME! Well, I shouted in my head.
It was only back home, when I saw all my spices and some veggies I still had left in the fridge, the idea came to make a hamburger trio. A Mediterranean one, a Oriental burger and a Mexican style burger.
These burgers are perfect for BBQ's, birthday parties, a big snack, or to look at. Yeah, you can just look at them if you like.
And if you are a meat-craving person just change the chicken to any type of meat you like. Also vegetarians can go totally vegan with this!

Burger Trio

Ingredients:
  • 400-500gr ground chicken
  • 3 good looking buns (mine where about 12cm wide)
for the Mediterranean burger:
  • rucola salat
  • ½ tomato, thin slices
  • 1tbs yoghurt
  • ½ paprika, thin slices
  • oregano
  • balsamico vinegar
  • olive oil
  • 1 garlic clove
  • balsamico cream
  • salt & pepper
for the Oriental burger:
  • ½ paprika, thin slices
  • yoghurt
  • cilantro, chopped 
  • tandoori spices
  • salt & pepper
for the Mexican style burger:
  • ½ zucchini, thin slices.
  • cheese
  • guacamole (find recipe HERE)
  • ½ tomato, thin slices
  • paprika powder
  • cumin powder
  • salt & pepper
Preparation:
Heat your grill or grill pan and start grilling the zucchini and the paprika.
Pepare the guacamole and the Mediterranean burger dressing: Mix yoghurt with some olive oil, crushed garlic and some balsamico vinegar.
While the veggies are grilling, devide the ground meat into 3 portions.
Let's see how to season one burger at a time.
Mediterranean needs to be seasoned with oregano, salt, pepper and a little olive oil. Mix it all really well. The Oriental burger needs tandoori spices, salt and pepper for seasoning and the Mexican style burger needs paprika powder, cumin (haf the amount of paprika powder), salt and pepper.
By now the veggies will be done. So start grilling the meat.
Cut your buns, it's time to start making the burgers look like burgers!
This is how to build you burgers:
Mediterranean burger.
Start by layering the zucchini, put the burger on, add some tomato slices, some rucola salad and finish with some dressing and some balsamico cream. Done!
Oriental burger.
The grilled paprika goes on first, followed by the tandoori burger, add some cilantro on top and pour some yoghurt on it. Number two... Check!
Mexican style burger.
Paprika first, hamburger with cheese on top, a slice of tomato and spread generously with guacamole.
All three are ready to devour!
Enjoy!


Mediterranean burger, Oriental burger, Mexican style burger and all three in half.


November 21, 2013

Wednesday 20 November 2013

Pasta Alla Matriciana

Basta, Basta...

No more pasta!
(Stop, Stop... no more pasta)

No more pasta?! Are you crazy? This is only my third pasta recipe. And believe me... I'm not done.
This next recipe is an easy, simple, fast pasta. Well, like almost any pasta really.
Up to now I gave you two seafood pastas, Spaghetti alle vongole and a nice Seafood spaghetti, and one pasta with meat; Pasta carbonara. Time for another one with meat!
 All'amatriciana or alla matriciana (said in Romanesco; the dialect from Rome, where I was born) is a sauce originally from Amatrice, a town in the Lazio region. This pasta is one of the most popular sauces in Italy. This sauce has even been declared 'Traditional Regional Food', but this label is only recognized in Italy.
You will need a few traditional Italian products for this, so go to your local Italiano-man and ask for them. Don't worry! If you can't find them, they are perfectly replaceable by other products.
Traditionally the pasta used in this recipe are 'Bucatini', but like I always say: "use whatever pasta you like!"
Like I said: Easy. Simple. Fast.
Lets go!

Ingredients:
  • 400gr pasta
  • 200gr guanciale, diced(this is bacon-like meat. But unlike bacon, which comes from the belly, guanciale is from the neck from the pig) If you can't find this, use bacon.
  • 500gr nice, fresh, ripe tomatoes, diced (In winter you can easily use canned tomatoes)
  • 150gr pecorino (preferably from Amatrice, because this is less salty than the Romano type. If you can't find this use pecorino Romano mixed with Parmigiano or only use Parmigiano)
  • 1 small peperoncino (red pepper, but not to hot! you only want a slightly spicy taste in the sauce!)
  • 2 tbs Olive oil
  • 10cl white wine (there is NO wine in a traditional amatriciana sauce, but I like to add it because white wine will enrich the flavors from your sauce!)
Preparation:
Start boiling your water for your pasta.
Take a large saucepan, heat the olive oil, add the whole peperoncino and guanciale or bacon and fry on medium heat. When the meat starts to have a nice golden/brownish color, add the diced tomatoes and the white wine and let it simmer on low heat for 10 to 15 minutes.
Start boiling your pasta. Check the time it needs to cook and make sure it will be ready approximately at the same time the sauce will be ready.
Just before the pasta will be ready, take out the peperoncino from the sauce.
When the pasta is ready, let it drain and add it to the sauce in the sauce pan. Slowly add most of the pecorino while stirring it all together. 
Serve on a plate and scatter the remaining pecorino just before serving.
ENJOY!


Guanciale, pecorine, olive oil and pasta

Amatriciana sauce with penne


november 20, 2013


Thursday 31 October 2013

Vegetarian TexMex Style Dish

Omnomnom...

Is the only thing you'll be able to say!

I love Mexican and Tex-Mex cuisine! You probably know this by reading my chili con carne recipe or the refried beans recipe, so I'm not going to bore you again by telling how much I love it!
The reason I like this vegetarian recipe is because in the first place it is a really easy dish and secondly it is delicious and cheap!
This dish is something you can serve to anyone! Kids love it, grownups love it, vegetarians love it, meat lovers love it and the fun is... you can eat it with your hands! ... or with fork and knife.
It can perfectly be served as a starter or main dish and you need some guacamole (recipe) and sour cream with it!
For you who really can't live a day without meat: add some ground beef to the tomato salsa. But before you do so, why not try it vegetarian style first?!

Vegetarian Tex-Mex dish


Ingredients:

  • 2 cans (2x400gr) of diced tomatoes
  • 1 small can of sweet corn
  • 2 red capsicums/paprikas, diced
  • 1 green capsicum/paprika, diced
  • 1 large onion, diced
  • 2 garlic cloves, diced
  • vegetable oil
  • grated cheddar/other cheese (to taste)
  • 2 tbs paprika powder
  • 1,5 tbs cumin
  • 1 to 2 tbs chili powder (to taste)
  • salt and pepper
  • 1 big bag of tortilla chips
  • guacamole
  • sour Cream
  • cilantro
  • lovely people to share it with
Preparation:
Heat some oil in a large saucepan and fry the onion and garlic. After 5 minutes add the capsicum and stew for a few minutes. Add both cans of diced tomatoes, the paprika powder, cumin and chili powder and let it simmer on low heat until most of the moisture has vaporized. Add the corn and let it simmer for a few more minutes. Season with salt and pepper and set aside.
Preheat the oven on "grill" setting.
Take a large oven-resitant dish. Spread out some tortilla chips so they cover the plate and top with 2/3 of the tomato salsa. Scatter some cheese on top to taste (want a heavy dish? put on loads of cheese! Want a light dish? wel, take it easy with the cheesy!). In the middle put a layer of tortilla chips smaller than the circle underneath and top with the remaining tomato salsa and some cheese.
put in the oven until the cheese has grilled nicely.
Sprinkle some cilantro on top and serve with some fresh guacamole, sour cream and the remaining tortilla chips.
Enjoy!


Sunday 27 October 2013

Hummus (and tahini)

Hummmmmus

The awesome Middle Eastern dip!

Dibs on the dip! 
I have never been to any Middle Eastern country, although I'd love to, but Ghent is a multicultural city with lot's of different cuisines and that is how I got to know hummus.
Hummus is a puree made from chickpeas and tahini, a sesame seed paste. It is healthy and contains a lot of fiber. However it also contains a lot of fat, but because the fat comes from olive oil, this isn't saturated fat.
Hummus is perfect for aperitif, side dish or even as a vegetarian main dish.

In order to make a good hummus you need tahini. You probably can get this in your local store but it is really easy to make yourself.
You need about 125gr sesame seeds and 4 tablespoons of olive oil.
Roast the sesame seeds in a casserole or for about 5 minuted in a 180°C oven.
Mix the roasted seeds with the olive oil. You should get a paste which is liquid enough to pour. You can keep tahini in your fridge for few weeks.

Hummus


Ingredients:
  • 1 can (400gr) of chickpeas, drained
  • liquid from the can of chickpeas
  • 5 tbs lemon juice
  • 2 tbs tahini (see text above)
  • 1 garlic clove
  • ½ tsp salt
  • 2 tsp olive oil
  • you can also add: 1 tbs cumin or a dash of cayenne pepper or ½ tbs paprika powder, ...
Preparation:
Combine all the ingredients, except the chickpea liquid, in a food processor and mix until you have a smooth mixture. Add about 4 to 5 tablespoons of the chickpea liquid and mix again. If the structure of the hummus is to thick you can add more liquid.
Garnish with some parsley.
Serve cold or warm with some toasted pitta bread!
Enjoy!

Hummus garnished with parsley

Hummus with olive oil and cayenne pepper

Saturday 26 October 2013

Spaghetti alle Vongole (clams)

Mama mia!

Is the best pasta ever! (read with Italian accent)

I can not believe it took me so long to post this recipe. This is my all-time favorite pasta!
Where would you say is the perfect place to live in Italy? I'd say Ostia Antica! It is a 20min. train ride from rome and a 10min. train ride from the sea, just perfect! Growing up there when I was with my father, I spent a lot of time playing in the fields surrounding his house, and once in a while we went to the shore, Ostia Lido, for lunch or diner. And what did I always eat? Pasta Vongole!
Not only the Italian restaurants can make a killer vongole but also my father himself!
And now I am learning to make it. The recipe is simple, but somehow I can't compete with my father's spaghetti vongole. But I keep practicing.
Anyways here is the recipe, and if you should give it a try... don't hesitate to put it on Instagram and tag @eatitblog in your picture!

Pasta alle Vongole

Ingredients:

  • 1kg vongole (clams)
  • 3 to 4 garlic cloves
  • 1 small bunch of parsley
  • extra virgin olive oil
  • 1 small dried hot red pepper
  • 400/500 gr spaghetti
  • Salt & Pepper
Preparation:
Vongole can contain some sand, and you don't want this in your pasta! Be shure to let them soak at least an hour in some salted water. Hint from my father: drop them with the open side on a clean surface and look carefully if they drop any sand. 
Start boiling slightly salted water for the pasta. 
Prepare the vongole in a large pot and on high heat, until they open. When opened turn of the heat and set aside. 
Put the spaghetti in the boiling water and cook until al dente.
While the spaghetti is cooking take a large pan and put in olive oil until the whole surface is well covered with oil. Crush the garlic and mince the hot pepper and add it to the oil on low heat (you DO NOT want the garlic to brown!) If you see the garlic is almost ready add some liquid from the the vongole and let it cook down a bit. Meanwhile chop the parsley and add half to the oil-garlic mixture.
Add the clams and the drained spaghetti and give it a good stir.
Serve with some parsley and black pepper to taste.
Enjoy!


Andalusia Part 2

FINALLY!

The rest of the Andalusia!


After a long writing pause ... 31 days!?! really!? ... We continued our Andalusian road trip to Cordoba, a town with a beautiful old city center and let's not forget: The Mesquita, a mix between a Catholic cathedral and a Moorish Mosque.
Tower from the Mesquita seen from the inner garden.

We only were in Cordoba for 2 days and one night and we stayed in the AC Hotel Cordoba, where we got a free upgrade to one of the best rooms in the hotel!
After Cordoba, which food-wise was a bit disappointing, we moved on to Sevilla. On the way we stopped in Ecija , called 'la sarten de España'. This town got it's nickname because in summer temperatures can easily get above 40°C. On first sight a small, boring town. But we stopped there because the town of Ecija got 11 beautiful towers! After eating, again, some tapas we moved on to Sevilla.
San Juan tower in Ecija

On the way we decided to make another stop in Carmona, a small town on top of a hill with a beautiful view over the andalusian landscape. Besides some Roman leftovers, narrow streets with old houses and the wonderful Parador, almost like a Moorish fortress, there isn't much.
Sevilla... finally we got there!

Sevilla is a lively city which has a lot to offer!
We stayed in an apartment at only 1 minute walking from the cathedral! Surrounded by little bars, locals and tourists and loads of horse carts passing by.
Here are some really good restaurants and tapas bars to go to in Sevilla:

Gastronomic tapas bar "Petit Comite": The pricing isn't as low as traditional tapas bars but the food is exquisite! I know the best tapas are the most simple ones. But gastronomically speaking this was the best we had in Spain.
Risotto from "Cerdo" with foie - Petit Comite

Tapas bar "Infanta": A big place which was completely full! Pricing was fine and the food really nice!

Salmon tartare with pumpkinseed ice-cream - Infanta


Tapas bar "De Varia Commensuracion": It seemed like a newly open place to us. Nice interior, good pricing and wonderful food!

Clockwise: Iberico kebab with cheese sauce, Duck with red wine sauce and fried banana,
the restaurant from outside & Grilled beef with garlic and cherry tomatoes. - De Vaira Commensuracion
After a week in the Andalusian inland we really needed the sea, so we decided to make a day trip to Faro, Portugal. If you should go there definitely take the speedboat to "Ilha Deserta" and after a long day go for a drink in restaurant/bar "O Castelo" back in Faro. Take a Caipirinha or a Mojito and enjoy the sunset over the Ilha and the sea... and the airport.
Caipirinha & Mojito - O Castelo
After Sevilla, and Faro day trip, we moved on to Cadiz where we stayed in the Parador de Cadiz. All the rooms have ocean view and you can open the window completely which gives makes your room one with the balcony. The breakfast in this hotel is overwhelmingly big, but Nutella-lovers be warned: they have none!
A few days cadiz and a visit to the Royal Andalusian Horse School in Jerez De La Frontera it was time to move on to our final destination on the road trip: Tarifa!
Tarifa is the place to go if you are a wind-sports person! Also whale- and dolphin watching can be done from the port of Tarifa and even day trips to Morocco.
If you are looking for a chill place to eat, go to "Pachamama". This grill-restaurant is along the beach road and serves an awesome mixed grill!

After two weeks of driving the Andalusian roads, visiting the beautiful cities and tasting the best tapas, it was time for us to head back home. It was an awesome trip and I've learned a lot from the Spanish cuisine which I can integrate in my own cooking!

Andalusia, you stole our heart!

The End.

Sunday 1 September 2013

Pasta Carbonara

Did you say pasta?!

Yeah! Join in!

Born in Italy, I practically grew up eating pasta. Not only at home but also in an Italian "ristaurante" or "trattoria". Going out for lunch (or diner) can be quit cheap in Italy, so it is normal for people to go to a trattoria and have a pasta, mostly followed by a meat or fish secondo, for lunch. 
A really easy pasta is the "carbonara". Unlike most people outside of Italy think, this is NOT made with cream! You only need 5 ingredients for a successful carbonara: eggs, parmigiano, bacon, black pepper and pasta. Traditionally a carbonara is made with spaghetti and you might know the that the Italians are really picky on which pasta goes with which sauce, but I am not, so I make it with penne. Why? Because the thing I love about penne is that they fill themselves with sauce. Mmmmmmm!
Now where does that name come from?
Someone once told me this pasta was a real mineworkers dish because it was so easy to make, you don't really need to know how to cook to prepare this. 
Anyway, some of the coal-dust stuck on their clothes, hair and hands fell on their pasta while eating it. This is represented by grounding black pepper on the pasta. Coal in Italian is carbone, hence the name "carbonara".


Pasta Carbonara


Ingredients: 2 servings

  • 2 eggs
  • 100 gr parmigiano, grated
  • 125 gr bacon, diced
  • Ground black pepper
  • 250gr pasta (any kind you like)
  • Some olive oil
  • Salt

How to make it:
Start by cooking your water for the pasta. Add somme olive oil and salt. Start boiling your pasta (penne will take about 10minutes). In the meantime take a pan and start frying the bacon. Now take a bowl and mix the eggs with 90% of the parmigiano. When the pasta is "al dente", which means it has a bite, pour away the water. DO NOT pour cold water onto your pasta! Immediately add the egg-parmigiano mix. The sauce will start to thicken because of the heat from the pasta. Add the bacon and give it a good stir so every ingredient mixes really well.
Grind on some black pepper and top with the rest of the parmigiano.
Buon Apetito! 


Thursday 29 August 2013

Glazed Drumsticks & Chili Sweet Corn Cobs

Howdy partner!

Turn on the heat!

I am a BIG fan of maple syrup. I already tried glazing bacon with it .. DELICIOUS! So I thought: "why not glaze a nice chicken drumstick".
Maple syrup is made from sap from the maple tree. It was first collected by the indigenous people of North America, and now the Canadians are largest producers of maple syrup in the world. It tasted so delicious they even decided to put the maple leaf on their flag! ... Well that is the reason I would have done it anyway!
Back to the kitchen.
I decided to add some extra ingredients, because maple syrup is really sweet and I wanted to spice it up a little bit. So I decided to add some BBQ sauce (find recipe here!!), some Harissa, some garlic and some other spices. I left the chicken to marinate for at least 6 hours, next time I'll let it marinate some more. But it turned out really good.
I hope you enjoy this recipe!


Glazed drumsticks & Chili sweet corn cobs

Ingredients: for 2 people
Drumsticks

  • 4 chicken drumsticks
  • 100 gr BBQ sauce (find recipe here!!)
  • 40 gr Maple Syrup
  • 1 big garlic clove
  • 2 tsp oregano
  • 2 tsp Harissa or something spicy!
  • Salt and Pepper
Sweet Corn
  • 2 Sweet corn cobs
  • 80 gr butter
  • 2 tsp chili powder
  • 1 tsp paprika powder
  • seasalt
Preparation:
Start by making the marinade for the chicken. Take a bowl and mix the BBQ sauce, the maple syrup and the harissa. Crush the garlic and add it together with the oregano and season with salt and pepper. Taste it and add more ingredients to your personal taste, like it sweeter? Add more maple syrup. Like it hotter? add more hot stuff.
Carve the chicken drumsticks and rub with the marinade (because the chicken is carved the flavors will absorb quicker into the meat!). Let it marinate for at least 5 to 6 hours.

Once the chicken has marinated enough, heat the oven at 200°C (about 400°F). Put the drumsticks in an oven tray and keep the remaining marinade for later use.
Soften the butter for the corn until your can mix it with the chili and paprika powder. Rub it on the corn and wrap the corn into tin foil.
Put the chicken in the oven. After 15 minutes put the corn in the oven, turn the drumsticks over and cover with some marinade. Do this every 10 minutes until the chicken has been in the oven for about 50 minutes.

Serve the drumsticks & the sweet corn cobs with some salad and some grilled vegetables.
Season the corn cob with some rough seasalt. Delicious!
Enjoy!

Glazed drumsticks & Chili Sweet Corn with a salad and grilled capsicum


Friday 23 August 2013

Easy Red Chicken Curry

Hurry hurry...

Eat that curry!

I like a good curry once in a while! Red curry, green curry, yellow curry, blue cur... wait... Not blue curry!
There are tons of different curries from different countries. But if we are talking red, green and yellow it is mostly Thai curry we are referring to.
The green curry I mostly use for fish and seafood dishes and is the hottest variation because it is prepared with green chili peppers. The red curry I use for meat or poultry. Red curry is made with the smoother, red chili peppers and commonly used in combination with coconut cream. The yellow curry, used with either fish or poultry, has a rich, bold taste and is significantly hot, but not overpowering.
For this recipe I am using a red curry paste which you can find in your local Asian store or maybe even in your supermarket (in Belgium you can find it in the supermarket).
If I'm feeling like having a real hot, hot, HOT red curry, I add an extra chili pepper or some "harissa", which is a Tunesian hot sauce much like Sambal, which I also could add.
I hope you'll enjoy this recipe and don't burn your fingers and your tongue!


Hint: serve this recipe with rice or bread. Why? Because a curry needs a side dish and rice and bread have a calming effect when your mouth is burning from hot, spicy food!

Easy Red Chicken Curry


Ingrediens:

  • 2 chicken breasts
  • 1 large onion
  • 2 tbs red curry paste
  • 1 tbs peanut oil
  • about 320ml coconut cream
  • 1 red paprika (capsicum)
  • 100 gr bamboo shoots (ask for it in the Asian store or supermarket)
  • 1 large onion
  • 1 tbs lemongrass
  • 1 garlic clove
  • Handful of cilantro
  • Optional: extra chili, sambal or harissa

Preparation:
If you are going to serve this with rice, start cooking your rice from now.
Cut the chicken into thin strips (I prefer about 1cm wide and 3cm long). Chop the onion into half rings, chop the garlic and chop the paprika into strips from about 2,5 long and about 0,5cm wide.
Take a large pan and heat the peanut oil. Start frying the garlic and onion.
After a minute or two add the lemon grass and the paprika and fry for another minute. Add the red curry paste and coconut cream and stir. Now add the bamboo and the chicken and let it simmer on low heat until the chicken is cooked.
But a nice ball of rice into a deep plate and add the curry. Top off with chopped cilantro.
Enjoy!


Guacamole

Olé olé

Time for guacamole!

It has been a while but here is the next recipe. It is easy, healthy and delicious!
Avocados are a healthy food. They are a good source for proteins, contain good fats (like fish, walnuts and most seed oils) and vitamin A (good for the eyes!) and they prevent inflammation and heart disease. 
A good way to eat avocado is to cut it in half, remove the pit and sprinkle with some line juice and black pepper and just spoon it out. Hint: if you have a half avocado you'd like to preserve: keep the pit in it. It will prevent the avocado from turning brown.
But there is another way: Guacamole!
Guacamole is an avocado mousse originally from the South of Mexico. It is eaten with tortilla's or tortilla chips or as a side dish. 
I am really fond of the pure avocado taste, so in my recipe I don't use tomato or onion. But feel free to add them to the recipe!

If you love avocado as much as I do, check out the Avocado & Salmon recipe!

Guacamole

Ingredients:
3/4 avocados
1tsp salt
1tsp black pepper
Juice from 1 lime
About 10gr chopped cilantro
1 garlic clove
Optional: 1 tomato, 1/2 onion, 1 small Jalapeño pepper

Preparation:
Cut your avocados in half and remove the pit. With a spoon take out the green, delicious avocado meat.
In a large bowl crush the avocado with a fork and add the salt, pepper, lime juice and chopped cilantro. Chop the garlic clove and add to the mixture.
Your Guacamole is ready to be served!
If you are going with the optional ingredients. Just add the into the mixture, finely chopped of course! 


Saturday 3 August 2013

Light and Easy Beef Wraps

Wrap it up!

And omnomnom!

After a lousy and cold start, we've had some great summer days, I can even say weeks. Yesterday we even had the hottest day in Belgium since August last year, with a "blistering" 36,2 C! Yeah, not thát hot in comparison to a summer in Spain, Italy, Australia, Morocco, Mexico, I could go on... But for Belgium, that is HOT, really hot.
And don't get me wrong here, I love the heat! But it is the sleeping part which I don't like.
Here are some tips to improve your nightly beauty sleep:
- Eat light, something like the recipe below!
- Take a shower, NOT a cold one because the cold will make your body heat itself up, and of course not a hot & steamy shower as well, a tepid one is perfect.
- Ventilate your room, but you don't want to have the draft directly on you because you could catch a cold!
- Spread your arms and legs when sleeping, this will allow your body to cool down.
Oh yeah, and I heard: don't sleep naked because your mattrass will absord all your sweat, it will cool down at night and you'll get a cold! Who want's a cold in the summer?

Back to the first point I mentioned: a light diner. This is a blog dedicated to food after all. 
I had posted this recipe one before, but it was hidden somewhere inbetween some kind of restaurant review and a cocktail recipe. So I thought: "Why not give this delicious and super-duper easy recipe it's own blog aticle?!" 
This beef wrap is a delicious and super easy recipe. You will love it! This isn't only the perfect light diner but it is also perfect lunch to take to work or school, prepare it for a picnic or as a afternoon snack.

Beef wraps


Ingredients:
  • 4 tortilla wraps
  • 1 red onion (red onions are sweeter than regular onions)
  • 500gr steak
  • paprika powder
  • salt & peper
  • 1 avocado
  • 2 hands full of rocket salad
  • 3 tsp sour cream
  • 1 tsp horseradish cream
  • cilantro
Preparation:
Season your steak with paprika powder, salt and pepper, set aside to marinate for a few minutes. Cut your avocado in to long strips. I cut it in half lengthwise, and each half I cut into 4 slices. Cut your onion into thin strips. Mix one teaspoon of horseradish cream with 3 teaspoons of sour cream.
Once you've prepared your veggies and your steak has absorbed the spices flavors, its time to grill! Grill your steak on the BBQ or a grill pan. When ready let it rest for 2 minutes. Spread one teaspoon of horseradish & sour cream mix on each tortilla wrap. Cut your beef into thin slices and divide evenly on the wraps. Add some avocado (about 1/4 avocado per wrap), some onion strips, some rocket salad, some cilantro and sprinkle with paprika powder. fold the rap into a roll.
If you like you can also add tomatoes, cheese, or use chicken instead of beef.
Aiaiai this is some good food señor!


03 August, 2013

Monday 22 July 2013

Seafood Pasta

Seafood!

Neptune his favorite meal!

I once read somewhere about Italian farmers combining their gold from the land, being pasta, with the diamonds from the sea, being seafood, and blablabla... Just a romantic story to say: Seafood pasta is AWESOME! Probably one of the best dishes in the world, that is if you like seafood. But who doesn't?!?
When I was a kid, growing up between Italy and Belgium, my favorite meal used to be "spaghetti alle vongole", a very simple pasta dish with cockles (a small kind of edible clams). Actually it still is one of my favourite dishes and my father is a master in preparing it! 
But I've discovered something else... In a restaurant hidden somewhere in Northern Italy, where only locals and their ocasional guests go, I've discovered a pasta called "spaghetti allo scoglio". It really blew me away. So good! The restaurant is called La Fontanina and they make a killer spaghetti allo scoglio, which in English would be called "seafood spaghetti".
Here is my recipe of how to make this dish. It isn't really the same as they serve in the restaurant, but I'm getting pretty close! 

For this dish I use bouchot mussels which are very small mussels. I think they are perfect to use in pasta dishes. If you can't find bouchot mussels just go for the smalles mussels available. It is much nicer to have small mussels in your pasta than having to find your pasta between giant mussels.

Spaghetti allo Scoglio

Ingredients: for 2 large portions
250gr spaghetti 
400gr (bouchot) mussels 
200 gr clams
6 prawns (peeled or unpeeled, your preference)
2 crayfish (1 per person)
3 garlic cloves
1 onion, chopped
1 can (400gr) diced tomatoes
1 tbs fresh oregano
1 tsp fresh thyme
1 small glass of white wine
Olive oil

Preparation:
Take a large casserole and heat 1 tbs of olive oil. Fry one, roughly cut, garlic clove and add the clams. put on the lid. After 1 minute add the mussels and the white wine. Shake once in a while and turn of the heat when the mussels are open. With a skimmer take out the mussels and clams and set aside. Strain the remaining liquid, to prevent potential sand in your dish, and set aside.
Take a large pan and fry 2 garlic cloves and the onion. After about 5 minutes add the diced tomatoes 
Add the herbs, the strained seafood liquid and let it simmer on low heat. Meanwhile start boiling slightly salted water to cook your pasta.
When the sauce has a thick structure add the crayfish and the prawns. At this moment start cooking your pasta. After about 7 to 8 minutes (the spaghetti needs to be al dente) add the mussels and clams to the sauce and stir. Get you pasta out of that water and add to the sauce. Stir the whole thing until the spaghetti is covered in sauce.
Serve on a large plate.
It is nice to have this in the middle of the table and serve everyone right at the table. 
Bellisimo!


Thursday 11 July 2013

Asian Style Mussels


Mussels from ...

... the sea.

Because of the cold weather we are having here in Belgium and surrounding countries, the mussel season had  been postponed with two weeks! But it is finaly there! Here in Belgium the musselseason goes from June until May.
Mussels are one of Belgium's traditional products, known as the famous "Moules frites"... and yeah, it are mussels with french fries on the side. By the way... isn't it weird that something typically from Belgium, talking about the fries here, is called french? But back to the mussels-business!
The traditional method to prepare mussels in Belgium is with white wine, or just nature. But not only the Belgians know how to prepare mussels! I've tasted some great Asian mussels dishes and the mediterraneans also have their tasteful ways of preparing this wonderful product.
Here is a recipe how I prepare Asian style mussels. It is a fresh, spicy and very aromatic preparation, perfect if you like to serve something special for your friends!

Hint: if you like raw oysters, try a raw mussel once; really delicious and a worthy aperitif! And it's cheaper than oysters.


Asian style mussels


Ingredients:
  • 1 kg mussels
  • 200ml coconut milk
  • 1 tsp chopped ginger (a nicely overfilled spoon)
  • 1 tsp chopped lemongrass (also a nicely overfilled spoon)
  • 1 small chopped chili pepper
  • 1 tbs fish sauce (you can find this in every Asian store, or even in a big supermarket)
  • 1 small chopped onion
  • 1 stalk of celery, chopped
  • a handfull of cilantro
  • 1 tbs peanut oil
Preparation:
Heat the oil in a large pot on high heat. Add the ginger, lemongrass, chopped chili, onion & celery. Only braise shortly for about 1 minute. Add the fish sauce and stew for another minute. Add the mussels and the coconut milk and put the lid on the pot. Shake after 5 minutes to make sure the mussels from the bottom get to the top and vice versa. The will be ready when the mussels are open. You don't want them to get overcooked, causing them to become rubbery.
Take your pot from the heat, add the chopped cilantro and shake up one last time. Serve with bread or white rice.
Delicious!


April 30, 2013

Wednesday 10 July 2013

Refried Beans

Mr Bean.

... is very nutritious!

I've liked the Tex-Mex kitchen from when I was small. Taco's, burrito's, quesadillas, and so on. Served with some nice home made guacamole, maybe a salad on the side and of course some refried beans!
Mmmm! Refried beans are something you must have on your table when serving Tex-Mex food!
They are a perfect side dish. Or maybe put some in your wrap, or stick some tortilla chips in some refried beans and heat in the oven with some grated cheese on top. Delicious! And really easy to make.

Refried Beans


Ingredients:
  • 1 can of Pinto Beans (or dry pinto beans)
  • 1/2 onion, chopped
  • 1 garlic clove
  • 1 tbs oil
  • 1 tsp chili powder
  • 1 tbs cilantro, chopped
  • additional: cumin powder, grated cheese, sour cream, ...
Preparation:
If you use dry beans, put them a night in slightly salted water to soak.
Heat the oil in a large skillet and fry the onion and the garlic. Add the chili powder and give it a stir (I like to add 1 tsp of cumin to). Now add the beans and cook until the beans are warmed through.
Mash the beans with a wooden spoon. If the beans are to dry, you can add some chicken broth to moisten. Stir in the cilantro.
Your refried beans are ready to serve! You can also put the beans in the oven with some grated cheese on top before serving. Or serve with some sour cream on top.

Enjoy!


July 10, 2013


Friday 5 July 2013

Sausage with beer sauce

Chutný!

Means Bon Appetit in Czech.

This something for the beer lovers out there! 
Some time ago I wrote e Belgian recipe with beer; "Genste Stoverij". Now I travel 900km to a country next to Germany and Poland. The Czech republic is not really known for it's culinary delicacies, but that does not mean you can't have a good meal over there!
So as I told you, this recipe is going to be with beer. Not a strong beer this time, just a pilsner. And what goes hand in hand with beer? Sausage! Just ask the Germans, their Oktoberfest is nothing but sausage and beer!
This dish is perfect to make when you are home alone or want to make an easy and cheap meal.

Sausage with beer sauce

Ingredients:
  • 2 nice sausages
  • 1/2 onion
  • 1 potato
  • 1 garlic clove
  • a hand full of parsley
  • 1 tbs flower
  • 1 tbs brown sugar
  • 1 tbs worcestershire sauce
  • 2 cans of beer (about 33cl)
  • pinch of salt
  • butter (to bake)
Preparation:
Boil some water in a pot, when it reaches boiling point turn down the heat and put in the sausages. Let them swell for 5 minutes and dry when done with a paper towel. Meanwhile cut the onion into rings, slide the garlic and cut the potato into small fries from about 2mm on 2mm. 
Take a prying pan and fry the sausages in the butter. After a few minutes add the onion and the garlic and let them stove with the sausage. When the sausage has a nice brown color and the onion looks glassy, add the  flower and let it bake a few minutes. Now pour over 1 can of beer and add the potatoes, the sugar and the worcestershire sauce.
Put on a lid and let it simmer on low heat for about 20 minutes. In the meantime cut the parsley. When the potatoes are ready, turn of the heat. Serve on a plate and garnish with the parsley.
Take the other beer and enjoy it with this dish!


July 5, 2013

Wednesday 3 July 2013

Caesar salad

All hail Caesar!

... the salad not the emperor.

I love a salad once in a while and this must be one of my favorites! The Caesarsalad. It is so simple yet so tasteful and rich. The original caesarsalad was not named after the great Roman emperor Julius Caesar... No, there once was an Italian chef, who lived in San Diego and worked somewhere in a restaurant in Tijuana. He prepared a salad and named it after himself; Caesar Cardini. Egocentric? Maybe. But genius! Because this salad nowadays is one of the most popular salads and you can find it in loads of different restaurants prepared in different ways. The original salad only consisted of romaine lettuce, croutons, garlic, parmesan, worcestershire sauce and a hard boiled egg. 
This original version sounded a bit boring for me, so in my recipe I add chicken, bacon and a dressing inspired on the other ingredients.
Imagine sitting poolside in the summer sun with a homemade caesar salad and a glass of red wine or a cold beer... Heaven!
This salad is perfect as a lunch, side dish or starter!

Caesar salad my way

Ingredients:
  • 1 chicken breast
  • a few slices of bacon
  • romaine salad
  • 1 egg, raw
  • 1 garlic clove
  • worcestershire sauce
  • lemon or lime
  • corn oil or sunflower oil
  • mustard, without seeds
  • yoghurt
  • old bread
  • olive oil
  • parmesan, not grated
  • salt & pepper
Preparation:
Start by cutting your chicken into small pieces and season them with salt and pepper. Bake your bacon until it is crunchy and put aside on a paper towel. Before adding it to the salad in the end, break the slices into smaller pieces.Bake the chicken in some olive oil until it has a nice brown color. Cut the bread into small squares and toast them in a frying pan in some olive oil.
Now take a bowl and a mixer. The dressing we are about to make looks a bit like mayonnaise, the making process is the same. Add the egg yolk to the bowl and squeeze in the garlic clove. add a tablespoon of mustard and the juice of half a lime or lemon. Put in your mixer and start mixing on a low speed. Slowly start adding some corn or sunflower oil while mixing. The mixture will begin to thicken as you add more oil. Once you've achieved the same density as a nice mayonnaise (which is pretty thick), add a tablespoon of yoghurt and a teaspoon of worcestershire sauce. Mix again on low speed until you have a smooth, liquid substance. (hint: you can add some anchovies to this mixture if you like!)
Now take a large salad bowl and add the salad. Now add the chicken and the bacon and pour over some dressing. Add the croutons and finish by grating some parmesan on top. (I use the slice grater to have nice "slices" of parmesan of about 2cm on 2cm)

Isn't this salad gorgeous?!
Enjoy!!!


July 3, 2013


Thursday 27 June 2013

Milano Special

Eat like an Italiano...

In Milano!


Milan... at first I did not like this city for one bit! But the more I go and the further I stay away from the tourist spots, the more I start to like this northern Italian city.
This week I went with my girlfriend to Milan for 3 days. Everytime we go to Milan we try to find new spots hidden to the big tourist public. In the area between the castle and the Duomo you'll find most tourists and loads of expensive restaurants where you can eat food which tastes like cardboard, so this is what you want to dodge on your visit. If you want less tourists and more local restaurants, stroll through the Corso Garibaldi towards the Garibaldi station. The station has been recently renewed and is a nice place to chill.

Where to eat?

Cena (Dinner)

If you like dining out, you should go to "Brunello Osteria" in Corso Garibaldi.
It is a small wine-restaurant with a cozy interior and a few tables outside. In a temperature of 25°C it is a perfect spot to sit outside and enjoy watching the, sometimes extravagant, Milanese inhabitants walking by.
We arrived at the restaurant and immediately a waitress showed us our seats and brought a menu card. Just a few minutes later we got a bottle of water, which we asked for, and an amuse geule: a fresh cherry tomato with tabouleh and creamy goat cheese, perfectly dosed with olive oil. A good starter for the evening.
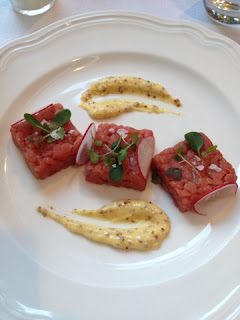
Steak tartar
On the menu you can find a mix of traditional and modern Italian dishes. The wine card offers a wide range of italian wines, most of them from the brunello grape. 
As starter we ordered a gazpacho with raw shrimp and melon and a steak tartar. The food tasted fresh, the gazpacho was perfectly balanced and the tartar was hand cut, always a plus for me!
For the main course we ordered a risotto with scallops and lemon and roasted piglet with apple and ginger cream.
The risotto was like it should be; moist and creamy. The piglet was perfectly roasted and went surprisingly well with the apple and ginger puree.
As we ate fish and meat the wine wasn't an easy pick. We were sugested a Girlan, Fass n• 9 vernatsch 2011, from Südtirol - Alto Adige, a light Italian table wine and a perfect match with both dishes.
As desert I took a espresso corretto with sambuca, I got almond biscuits on the side. My girlfriend took shortbread with lemon and vanilla cream and red berries.
Good value for your money here!
The owner of this restaurant is the same as the Sushi/Fusion restaurant across the street. Haven't tried it, but it is on my TO DO list!

Risotto with scallops

Another restaurant in this neighborhood is "Pizzeria La Fabbrica, con cucina", Situated at the Porta Garibaldi. I told you about this restaurant in one of my previous articles, the one about pizza. Also the Mozzarella Burrata mentioned in my article about insalata caprese is a delicacy you can taste at this restaurant. You can eat pizza's, pasta's and different kinds of meat and fish at reasonable prices and if you are lucky you can spot a designer having lunch or dinner. Last time we saw the big boss from Emporio Armani.
Definitely a recommendation!

Another really nice place to go are the canals from Milan. Say what? Canals? No it is nothing like Venice, but Milan has a few narrow canals, which start at Viale Gorizia, with bars and restaurants along the waterfront. You'll find mostly locals hanging in the bars sipping wine, cocktails or beer in a lively and friendly atmosphere.
If you are looking for a quick and relatively cheap dinner, this is definitely the place to look. Loads of pizzeria's and trattorie to choose from, also for a more sophisticated dinner you can find something here.
We decided to try a pizza in "Locandina dei Navili". We sat outside and ordered a pizza each. It wasn't the best pizza Italy has to offer, but for €16 per person we had dinner with 0,5l red wine, 0,75l bottle of sparkling water and a coffee, and not to forget... the nice surrounding.

Canals of Milan at night

Pranzo (Lunch)

Also lunch is something you don't want to skip! And if you want to make it cheap and quick, Italy is the country you have to be.
For a quick lunch head to "Osteria del corso". You'll find easy food such as pastas and roasted chicken or vitello tonnato served with a contorno of your choice (=side dish, in Italy you only get meat or fish if you order so, if you want veggies or potatoes you can take a contorno). We tried a pasta with tomatosauce and mozzarella and a roasted chicken drumstick with zucchini as contorno.
Cheap, fast, tasty and 100% Italian.


Duomo of Milan

If you would get hungry and you are shopping in the Corso Vittorio Emanuale II nearby the Duomo, just turn into a side street called Via Cesare Becceria. There you'll find, at piazza beccaria, a hotspot for the local working man... or woman. A corner restaurant, with a view on the top of the Duomo. It seems the place where the local people lunch during working hours. I must admit it is quite noisy, but it is local and there are plenty of seats, both inside and outside. We took two panini. One with panino "Praga", with cooked ham, and one panino "centro",with chicken breast and smoked scamorza cheese. The service was impeccable, the food was tasty and don't forget... it's cheap for its location.


I hope you have an idea where to go for lunch or dinner the next time you go to Milan.
Ci vediamo a Milano!


June 27, 2013